As discussed in PART 1 of our walkthrough, the CommonApp website is the platform for undergraduate students to apply to universities in the US. You must have already filled the universities and basic information on the app. The next step is to fill university specific requirements.
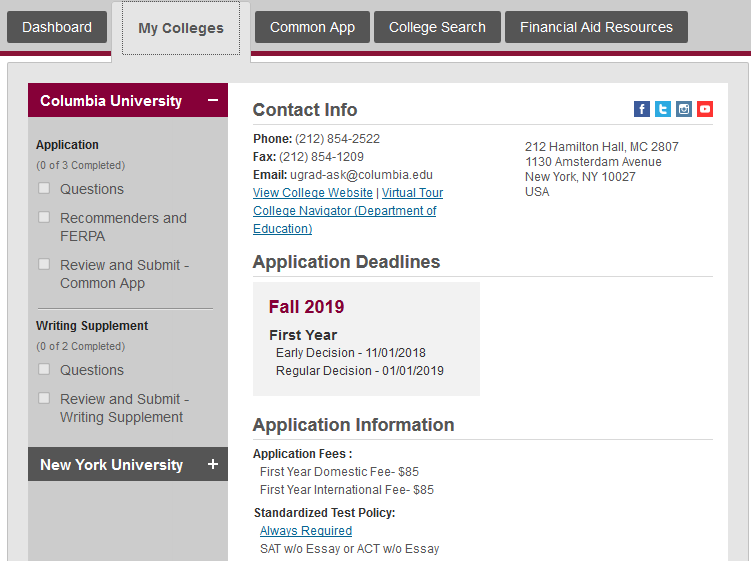
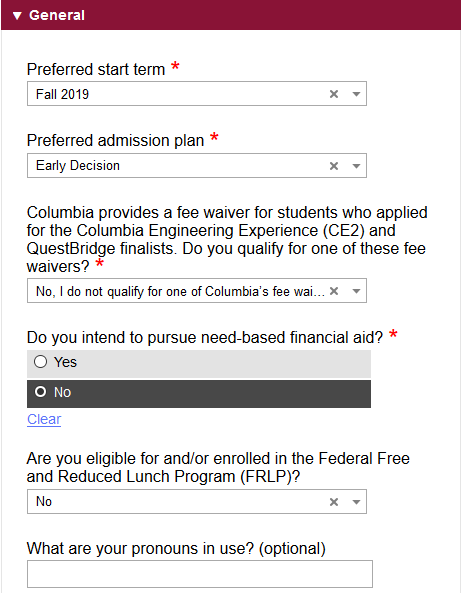
Each university will have a separate set of essays and requirements that you need to fill in for your application. These could be a couple of questions to an entire set of extra questions including extra writing samples. It all depends on the university. The universities that you had selected earlier will appear.
You can check the university specific requirements in the ‘My Colleges’ tab. All necessary details, like deadlines, types of recommenders needed, extra writing samples, extra questions, application fee, etc. are all given here.
If you wish to be considered for scholarships, we recommend not selecting ‘Early Decision’ as your preferred admission plan.
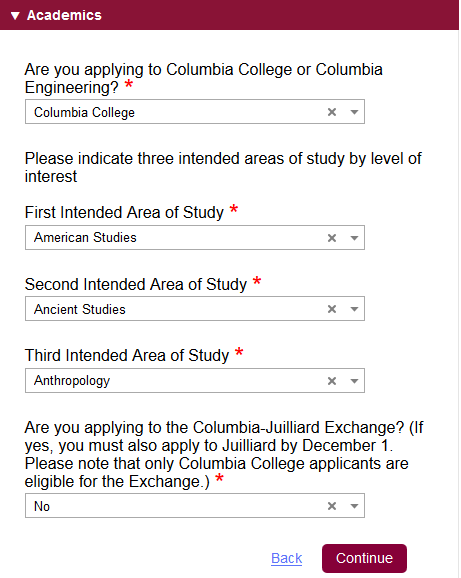
In a section of this part of the application, you will be asked to enter the subjects that you wish to study. There will also be an option called ‘Undecided’. It is perfectly alright to select this option since a lot of domestic students choose this option as well. It just shows that you do wish to study in college, just aren’t sure of your career path. If you wish to give multiple options as the answers, please make sure you select fields that are related to each other or at least in a similar ball park. For example, if you select Computer Science and Data Analytics, it makes sense that your field of interest is computer science; but if you enter political science and biology together, it shows your indecisiveness. In this case, choose ‘Undecided’.
Recommenders & FERPA
This is also the tab under which you need to add the details of your recommenders, advisors and counselors. Never add details of a parent, unless you are homeschooled. Click on the ‘Recommenders and FERPA’ tab under any university. The first segment under ‘For All Colleges’ is given for you to add recommenders and waive your right to view the recommendations they submit, and the transcripts uploaded on your behalf. It is necessary that you waive your right since it establishes trust between you and the university as well as the teachers’ recommenders. It ensures that you aren’t tampering with any documents while submission.
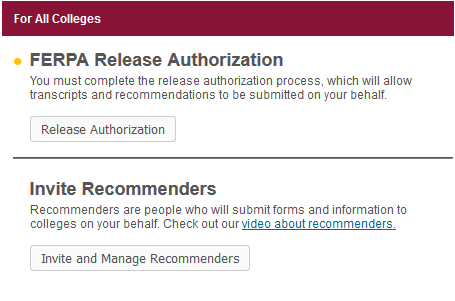
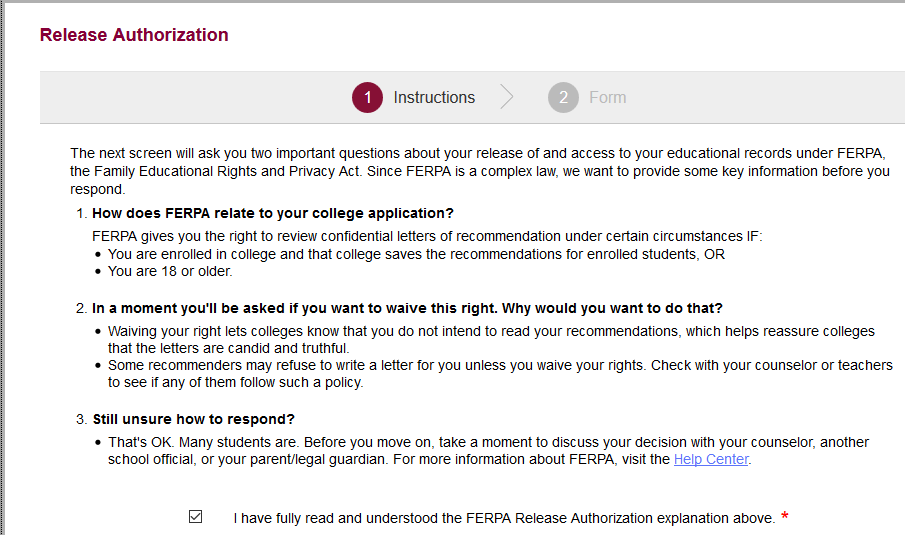
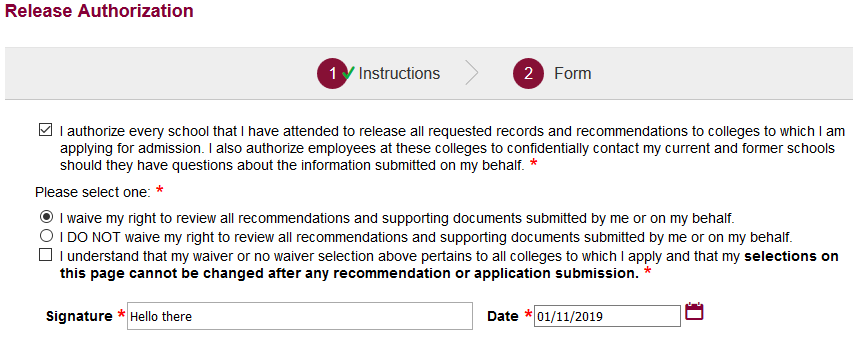
One you have agreed to waive your right to the recommendations as well as the transcripts, you will be asked to fill in the details of the advisors/recommenders/counselors. You will notice that all their names and information is added to a list.
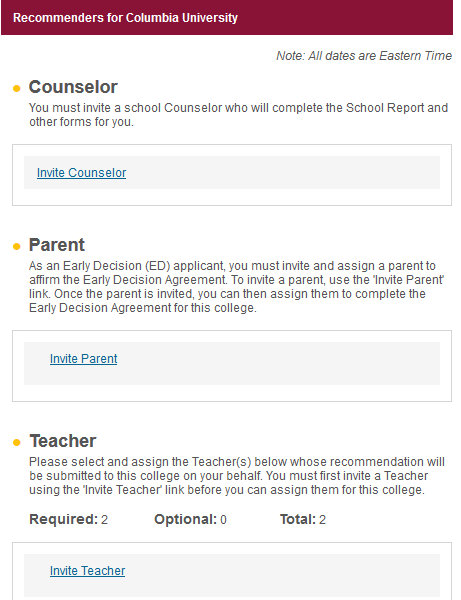
After you have added all the names to the list, you can now assign them college-wise. Emails will be sent to them only after you assign them to the colleges.
Now, it is important to know whether your school uses CollegeApp or Naviance.
Find more information about this here:
https://www.commonapp.org/files/ready-resources/CAReady-Naviance.pdf
Speak to your counselor about the process that the school uses. Common App gets this information about your school when you fill in the details itself.
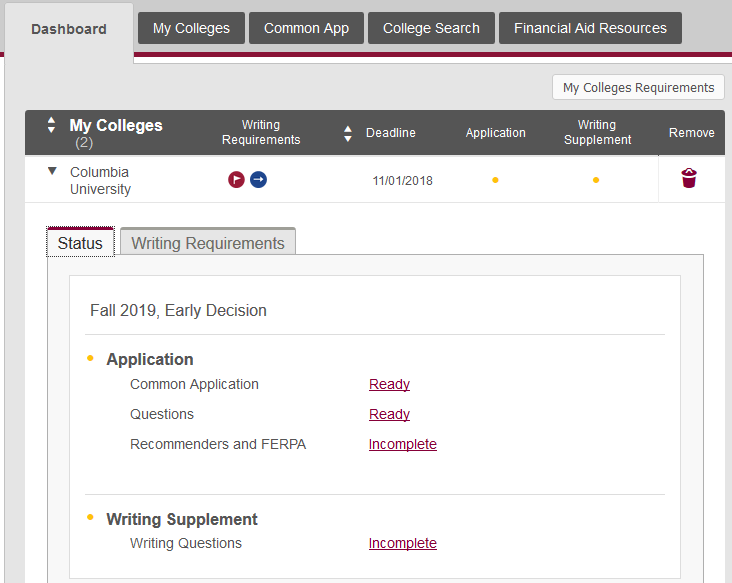
Final submission of the application happens only once you have completed all the sections. Make sure to check for a green tick mark on the sections to ensure that they are all complete or check the dashboard and see that everything is ‘Ready’.
The Final Check
There is an option of checking your entire application in PDF form before submitting it and paying the fee. Make sure you do so. This will help in cross checking everything and making sure that all essays have proper indentation and formatting.
If you have any issues, the website itself has an FAQ section on the right side. Also, every section has video links attached to the top which provide a lot of information.
If you are still having difficulties, then you can always contact EducationUSA for help.
Hope this article helped understand the process of application submission via CommonApp. All the best!


